How-to
Ender 3 extruder upgrade: options, install and e-steps
Swap the stock plastic Bowden extruder for a metal single-gear, dual-gear or BMG-type extruder on the same motor, then change the E-steps from 93 to the new extruder's value: 130 for the Micro Swiss or 140 for the TH3D dual-gear kit, 415 for a BMG. The same parts fit the Ender 3, Ender 3 Pro and Ender 3 V2.
Edited by 3D Printeray EditorsPublished Last verified 8 min read
In this section: Extruders(14)
On this page (6)
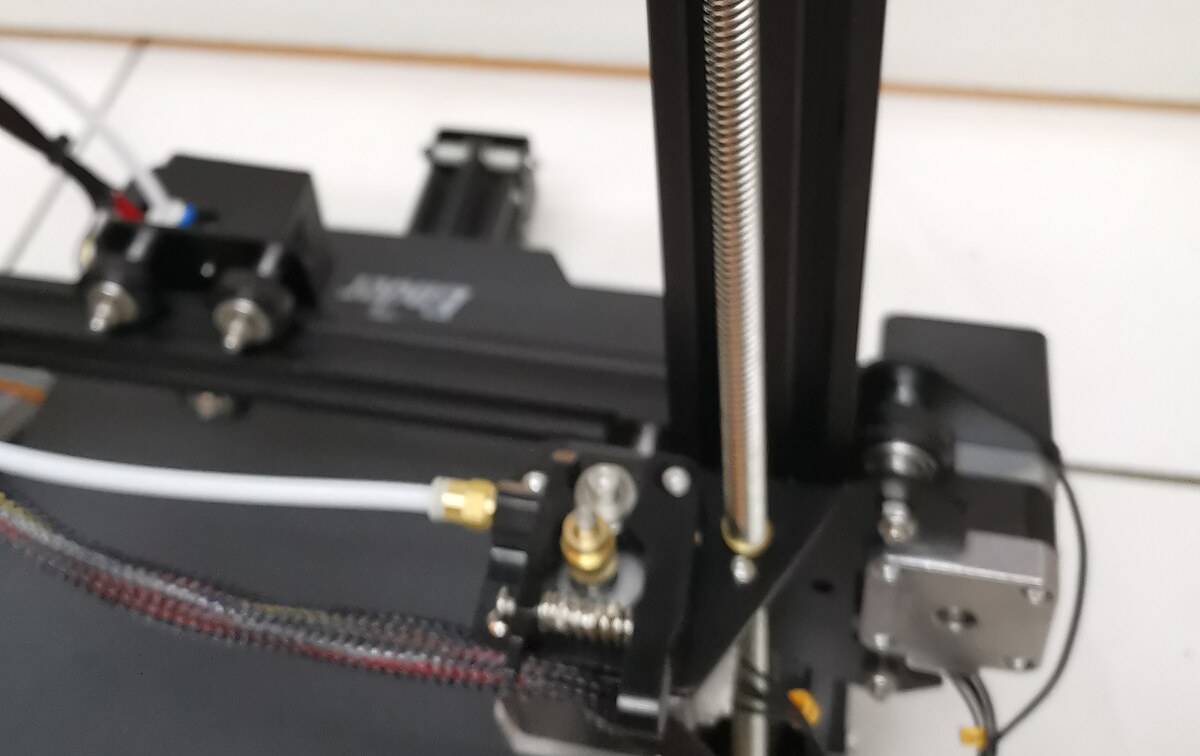

To upgrade the extruder on an Ender 3, Pro or V2, replace the stock plastic Bowden extruder with a metal or geared one on the same motor and mount. Then change the E-steps (motor steps per millimeter of filament) from the stock 93 to the new extruder’s value: 140 for TH3D’s dual-gear kit, 130 for Micro Swiss’s and 415 for a BMG. Creality publishes no value for its own kit, so keep 93 and calibrate.
On November 4, 2026, TH3D’s kit cost $19.99 in the US and Micro Swiss’s cost $47.50. TH3D, a US Ender 3 parts vendor, gives the reason to bother: “Over time the extruder arm tends to crack from holding the filament and this results in printing failures.”
What extruder upgrades fit the Ender 3?
Four upgrades fit the Ender 3, Pro and V2: an aluminum single-gear extruder, a metal dual-gear Bowden extruder, a BMG-type geared extruder or a direct drive conversion. The first three bolt on where the old extruder sat and reuse its motor. Only a single-gear unit that keeps the stock drive gear stays at 93 E-steps.
Sorted by starting E-steps, lowest first, with US prices on November 4, 2026:
| Upgrade | Example and US price | Gearing | Starting E-steps | What it fixes, what it needs |
|---|---|---|---|---|
| Aluminum single-gear extruder | No US price confirmed | One drive gear on the motor shaft presses the filament against an idler bearing, as on the stock extruder | 93, if it keeps the stock drive gear | Replaces the plastic arm. Nothing else changes. |
| Metal dual-gear extruder | Micro Swiss Bowden Dual Gear Extruder, $47.50 at the Micro Swiss store | Two hardened tool-steel gears, one on the motor and one on the arm, grip the filament from both sides | 130 | Replaces the arm. The motor must turn the other way; Micro Swiss includes a reversing cable. The stock motor gear must be held by set screws. |
| Metal dual-gear extruder | TH3D Upgraded Dual Drive Gear Extruder, $19.99 at TH3D Studio | Two gears grip the filament from both sides | 140 | Replaces the arm. Listed for the Ender 3, Pro and V2. |
| BMG-type geared extruder, Bowden | Bondtech BMG Creality kit with mount, $42.50 at Printed Solid (end of life; regular price $85.00). Clones: no US price confirmed | 3:1 reduction (Klipper notes it is really 50:17) drives two gears | 415 | Replaces the arm; the reduction multiplies the motor’s torque at the filament. The motor must run the other way. |
| Direct drive conversion | $18.00 (Creality Sprite Extruder SE, listed at $20.00) to $119.95 (Micro Swiss NG Direct Drive Extruder) | Depends on the kit | The kit’s own: 400 on the NG | Moves the extruder above the hotend for soft TPU and short retractions. Kits and steps: Ender 3 direct drive. |
Creality’s own kit. Creality’s all-metal dual-gear kit was not listed on the company’s US store on November 4, 2026. The Creality kits listed by 3D Printer Gear in Australia and 3DEA in New Zealand were out of stock, and neither listing gives an E-steps value. Keep 93 and calibrate (steps 10 and 11 below).
Ender 3 Pro and V2. The same upgrades fit both. Marlin’s example configurations give the Ender 3, Pro and V2 the same 93 steps/mm. TH3D lists its dual-gear kit for all three, and Bondtech lists its BMG kit for the “Ender3, Ender-3 V2; Ender-3 Pro”. Micro Swiss names the Ender 3 but not the Pro or V2.
Creality added a rotary knob to the V2’s extruder because “the extrusion clamp is easy to be broken”. The Ender 3 V2 Neo already ships with a full-metal Bowden extruder, which Creality says “has greater extrusion force and is more durable”.
Whether two gears beat one, and when the swap pays off, is covered in dual gear extruders. Upgrades for other printers are in extruder upgrades.
How do you install a dual gear extruder on an Ender 3?
Unload the filament, let the hotend cool and unplug the printer. Remove the stock arm, extruder body and motor gear, then fit the kit’s gear and body to the same motor and reconnect the PTFE tube. Check that filament feeds toward the hotend, set the kit’s E-steps with M92 and M500, and calibrate with a 50 mm extrusion.
For its kit, Micro Swiss lists 2.5 mm, 2.0 mm and 1.5 mm Allen keys (the 1.5 mm is in the box), a 10 mm wrench and a sharp knife. The Micro Swiss kit brings its own motor gear, and a BMG drives through its own 17-tooth pinion (the 50:17 in Klipper’s BMG gear_ratio), so on those the stock gear has to come off its shaft. Check your kit’s parts list for a motor gear before you start.
How to install a dual gear extruder on an Ender 3, step by step
- Unload and cool. Heat the nozzle and unload the filament. Let the hotend cool to room temperature, then turn off and unplug the printer.
- Disconnect the extruder. Unplug the extruder motor cable. Press the coupler’s plastic collar toward the extruder and pull out the Bowden tube.
- Remove the arm. Unscrew the tension bolt and take out the spring, then unscrew the pivot bolt and lift off the plastic arm.
- Remove the body and motor. Support the motor and unscrew the three remaining bolts. The motor and the old extruder body come free.
- Remove the motor gear. Loosen the gear’s two set screws and slide it off the shaft. If it has no set screws, it is pressed on. Micro Swiss says such a motor lacks the flat (D-cut) shaft its gear needs and has to be replaced. It recommends Creality’s 42-40 stepper motor.
- Fit the new body and gear. Screw the new body to the motor with the kit’s three M3 screws, filament outlet toward the hotend and motor connector facing the rear. Slide on the kit’s motor gear with a set screw over the shaft’s flat, line it up with the gear on the arm and tighten.
- Fit the arm and spring. Attach the arm with its pivot bolt, then the spring and tension screw. Start at medium compression, short of squeezing the coils solid. Micro Swiss tightens its nut until the bolt end sits flush with the nut.
- Reconnect the PTFE tube. Cut the tube end square, push it through the coupler to the internal stop and fit the retaining clip. Micro Swiss’s compression fitting instead takes a beveled tube end and a snug nut, since overtightening squeezes the filament path. Tug the tube to check it holds.
- Check the direction. Plug the motor in, heat the nozzle, load filament and extrude a few millimeters. If the filament backs out, reverse the motor: fit the kit’s reversing cable (Micro Swiss includes one), flip
INVERT_E0_DIRin Marlin and reflash, or add or remove the!before the Klipperdir_pin. - Set the E-steps. In Marlin, send
M92 E140for TH3D’s kit (or your kit’s value from the table below) and save it withM500. Micro Swiss also provides a G-code file that sets and saves its 130. In Klipper, setrotation_distanceunder[extruder]and restart. Creality’s kit has no published value: leave 93 in place and go to step 11. - Calibrate the extrusion. With the nozzle hot, mark the filament about 70 mm above the extruder’s intake and measure the distance (the method in Klipper’s documentation). Extrude 50 mm slowly (
G91, thenG1 E50 F60) and measure again. The length that went in is the first measurement minus the second. New Marlin steps = old steps × 50 ÷ that length; new Klipperrotation_distance= old value × that length ÷ 50. Say 47 mm went in on a kit set to 140: 140 × 50 ÷ 47 = 148.9. Repeat if it was off by more than about 2 mm. - Check retraction. For its Bowden extruder, Micro Swiss suggests about 5.0 mm with the stock PTFE-lined hotend and about 3.5 mm, 4.0 mm at most, with an all-metal hotend. More on the second case in retraction for all-metal hotends.
What are the e-steps for an Ender 3 dual gear extruder?
Start at 140 steps/mm for TH3D’s Upgraded Dual Drive Gear Extruder and 130 for the Micro Swiss Bowden Dual Gear Extruder, up from the stock 93. A BMG-type geared dual-drive extruder starts at 415. Retail listings for Creality’s own kit give no value, so leave it at 93. Then calibrate every kit, because grip varies between units and spools.
Sorted by steps per mm. The Klipper values come from Klipper’s formula: 200 full steps × 16 microsteps ÷ steps per mm (16 is the microstepping in Klipper’s Ender 3 example). Measure your own afterwards.
| Extruder | Marlin steps/mm | Klipper rotation_distance |
|---|---|---|
| Stock Ender 3, Ender 3 Pro, Ender 3 V2 | 93 | 34.409 |
| Aluminum single-gear on the stock drive gear | 93 | 34.409 |
| Micro Swiss Bowden Dual Gear Extruder | 130 | 24.615 |
| TH3D Upgraded Dual Drive Gear Extruder | 140 | 22.857 |
| Bondtech BMG or a BMG clone | 415 | 7.711, or 22.679 with gear_ratio: 50:17 |
Left at 93, TH3D’s kit feeds about 66% of the filament the slicer asks for (93 ÷ 140), and a BMG about 22% (93 ÷ 415). Klipper explains why the starting value is only a start: the grip of the drive gear “can vary” from printer to printer, and “can even vary between filament spools”.
Can you put a BMG extruder on an Ender 3?
Yes, as a Bowden extruder on the frame. Bondtech’s Creality kit (the BMG plus a mount) uses the printer’s own motor; Bondtech says “E-steps needs to be updated to 415 and the rotation direction of the motor needs to be reversed”. Bondtech also sells the kit without a mount. Printed Solid notes that the kit’s mount “has no place for a filament sensor”.
Clone listings, such as 3DEA’s “Cloned BMG Extruder”, describe the same “internal 3:1 ratio gears” but give no E-steps value. Start a clone at Bondtech’s 415, check its direction (step 9 above) and calibrate. 3DEA’s listing names no mount in the box, so check that a clone comes with an Ender 3 mount before buying.
Genuine and clone BMGs compared: BMG extruder. Klipper gear_ratio, motor current and retraction for a BMG: BMG extruder settings.
Sources
- TH3D Studio, Creality Ender 3 & Ender 3 Pro: Upgrades, Information, and Tips (accessed November 4, 2026)
- TH3D Studio, Upgraded Dual Drive Gear Extruder (CR-10/CR-20/Ender 3/Ender 5 and More) (accessed November 4, 2026)
- Micro Swiss, Bowden Dual Gear Extruder (accessed November 4, 2026)
- Micro Swiss, Bowden Extruder installation instructions (PDF) (accessed November 4, 2026)
- Bondtech, Creality3D CR-10/Ender3 Upgrade Kit (accessed November 4, 2026)
- Bondtech, BMG Extruder datasheet (PDF) (accessed November 4, 2026)
- Printed Solid, Bondtech BMG Extruder Creality3D kit CR-10/Ender 3 mount (EOL) (accessed November 4, 2026)
- Creality Store (US), search results for dual gear (accessed November 4, 2026)
- Creality Store (US), Sprite Extruder SE / SE-NEO (accessed November 4, 2026)
- 3D Printer Gear, Creality All Metal Dual Gear Extruder Upgrade Kit (accessed November 4, 2026)
- 3DEA, Creality Red Metal Dual Gear Extruder for Ender 3 Series and CR-10 Series (accessed November 4, 2026)
- 3DEA, Dual Drive extruder: Cloned BMG Extruder CR10 1.75mm (accessed November 4, 2026)
- TH3D Studio, Micro Swiss NG Direct-Drive Extruder for Creality CR-10/Ender 3 Printers (accessed November 4, 2026)
- Micro Swiss, NG e-steps G-code (MS_NG_ESTEP400.gcode) (accessed November 4, 2026)
- Creality, The Differences: Ender-3 VS Ender-3 Pro VS Ender-3 V2 (accessed November 4, 2026)
- Creality, Ender-3 V2 Neo 3D Printer (accessed November 4, 2026)
- Kobee, How to upgrade the extruder on a Creality Ender 3 or CR-10 printer (accessed November 4, 2026)
- Marlin Firmware, example Configuration.h for the Creality Ender-3 (CrealityV422) (accessed November 4, 2026)
- Marlin Firmware, example Configuration.h for the Creality Ender-3 Pro (CrealityV422) (accessed November 4, 2026)
- Marlin Firmware, example Configuration.h for the Creality Ender-3 V2 (CrealityV422, CrealityUI) (accessed November 4, 2026)
- Marlin documentation, M92: Set Axis Steps-per-unit (accessed November 4, 2026)
- Marlin documentation, M500: Save Settings (accessed November 4, 2026)
- Klipper documentation, Rotation distance (accessed November 4, 2026)
- Klipper, example config printer-creality-ender3-2018.cfg (accessed November 4, 2026)