How-to
Orbiter extruder Klipper config: rotation distance, current
Set rotation_distance to 4.69 with no gear_ratio and run_current to 0.85 A with stealthChop off, then start pressure advance at 0.025 and retraction at 1 to 1.5 mm. Those are the designer's published values for the LDO Orbiter v2.0 and v2.5; calibrate the rotation distance and pressure advance on your own printer.
Edited by 3D Printeray EditorsPublished Last verified 8 min read
In this section: Extruders(14)
On this page (8)

For the LDO Orbiter v2.0 and v2.5, set rotation_distance: 4.69 with no gear_ratio, run_current: 0.85 with stealthChop off, max_extrude_only_velocity: 120, a starting pressure_advance of 0.025, and 1 to 1.5 mm of retraction at 120 mm/s. Those are the published values of the extruder’s designer, Róbert Lőrincz. LDO Motors’ configuration sheet gives the same current but a rotation distance of 4.637: start from 4.69 and let the 100 mm extrude test in step 5 set your final number.
Gearing, weight and mounts are on the Orbiter extruder page.
Orbiter extruder Klipper config for v2.0 and v2.5
Paste these lines into the existing [extruder] and [tmc2209 extruder] sections of printer.cfg, replacing any line with the same name. The values are from the designer’s Orbiter v2.0 page unless a comment says otherwise.
[extruder]
# Keep from your current [extruder]: step_pin, dir_pin, enable_pin,
# heater_pin, sensor_type, sensor_pin, control and pid_Kp/Ki/Kd,
# min_temp, max_temp, min_extrude_temp and nozzle_diameter.
# Delete any gear_ratio line: 4.69 already includes the Orbiter's gearbox.
microsteps: 32
full_steps_per_rotation: 200
rotation_distance: 4.69           # LDO's sheet: 4.637. Calibrate either one.
filament_diameter: 1.750
max_extrude_only_distance: 500    # Klipper's default of 50 blocks a 100 mm test
max_extrude_only_velocity: 120    # lets retractions reach 120 mm/s
max_extrude_only_accel: 3000      # designer's extruder acceleration (rated to 8000)
pressure_advance: 0.025           # starting point, tune it
pressure_advance_smooth_time: 0.03

[tmc2209 extruder]
# Keep your uart_pin line.
interpolate: False
run_current: 0.85                 # amps RMS (1.2 A peak), LDO-36STH20-1004AHG motor
sense_resistor: 0.110             # must match your driver board
stealthchop_threshold: 0          # stealthChop off, as the designer requires
driver_TBL: 0
driver_HEND: 6
driver_HSTRT: 7
driver_TOFF: 4
# No hold_current: Klipper recommends leaving it unset.
The published Orbiter v2.0 configs differ in a few lines:
| Setting | Designer’s v2.0 page | LDO’s v2.0 configuration sheet | Designer’s Orbitool O2 toolboard config |
|---|---|---|---|
rotation_distance |
4.69 | 4.637 | 4.69 |
microsteps |
32 | 16 | 32 |
interpolate |
False | True | False |
run_current |
0.85 | 0.85 | 0.8 |
hold_current |
Not set | 0.100 | Not set |
pressure_advance |
0.025 | 0.025 | 0.02 |
| Extruder acceleration | 3000 mm/s² to cut clicking, 8000 max | 10000 mm/s² | Not set |
| Retraction | 1 to 1.5 mm at 120 mm/s | 1 to 1.5 mm at 120 mm/s | 1.2 mm at 120 mm/s |
Microsteps do not change rotation_distance, so 16 with interpolation and 32 without both work. Klipper’s TMC driver guide favors interpolate: False with more microsteps for positional accuracy, and advises against hold_current because changing current at standstill can move the motor.
For other drivers, change only the driver section. A TMC2208 takes the same lines under [tmc2208 extruder], as in LDO’s sheet. For a TMC2240, the designer’s block for his O2S toolboard drops sense_resistor, sets rref: 12000 and uses driver_HEND: 3; use your board’s rref. The designer publishes the driver_ lines for TMC2209 and TMC2240 only.
How to set up the Orbiter extruder in Klipper
- Paste the block. Merge the lines above into your
[extruder]and[tmc2209 extruder]sections. Delete anygear_ratioline left from the old extruder: Klipper multiplies the steps by it, so a BMG-style50:17makes the Orbiter push 2.94 times too much filament and a Creality Sprite’s42:123.5 times too much. - Set the pins and sense resistor. Keep the
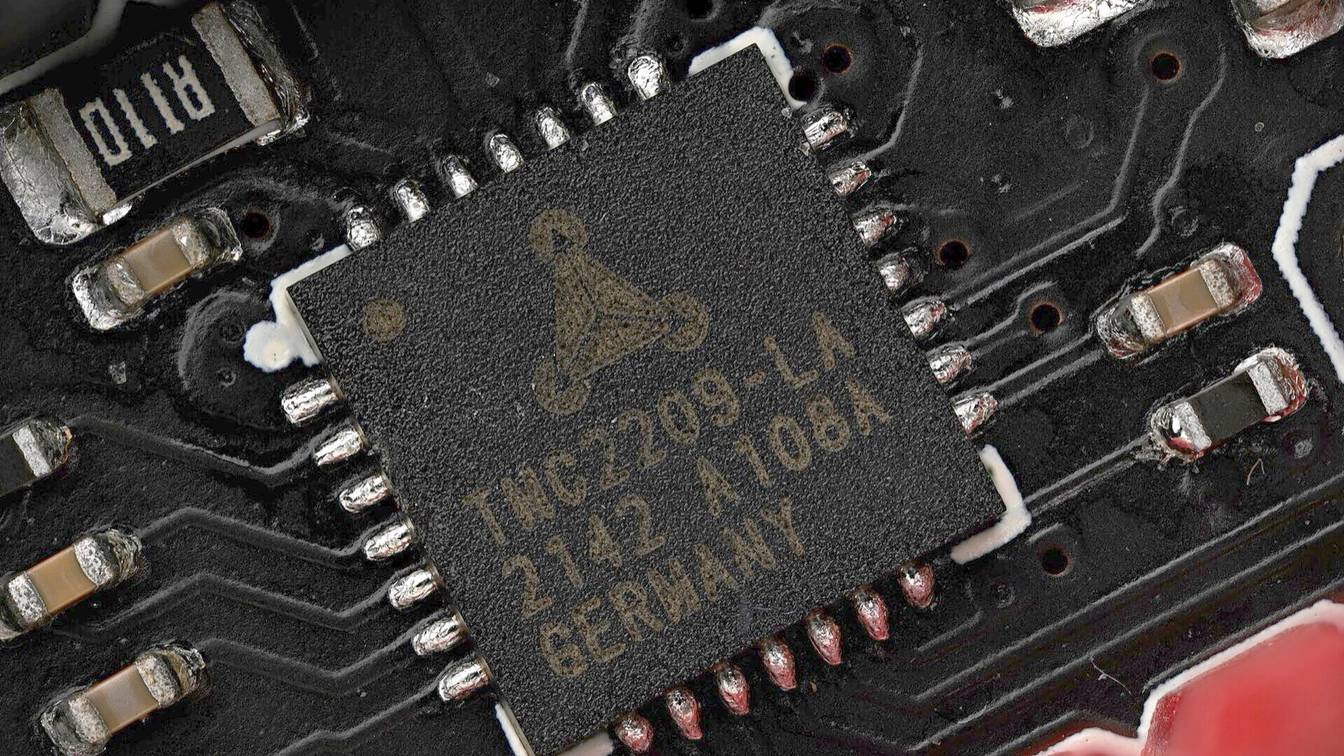
step_pin,dir_pin,enable_pinanduart_pinof the driver port or toolboard that runs the Orbiter motor. Setsense_resistorto the driver’s value: 0.110 for TMC2208 and TMC2209, usually 0.075 for TMC5160 and 0.051 for TMC2660. The two identical large resistors beside the driver chip carry the value; “R110” means 0.11 Ω. Then runFIRMWARE_RESTART. - Check the direction. Heat the hotend to printing temperature, load filament and extrude 10 mm with
G91thenG1 E10 F300. If the filament moves up, add or remove the!in front of thedir_pinpin name and restart. The Orbiter can turn the opposite way to the extruder it replaces: the designer’s own toolboard config invertsdir_pinfor one of his extruders and not for the Orbiter v2. - Confirm the current. Send
SET_TMC_CURRENT STEPPER=extruder CURRENT=0.25and extrude a few millimeters. The motor should turn but skip easily, which proves the setting reaches the driver (the designer’s test uses 0.2 to 0.3 A). Set it back withSET_TMC_CURRENT STEPPER=extruder CURRENT=0.85. After a print, the motor should be no hotter than 75 °C at room temperature. - Calibrate rotation_distance. With the hotend hot, mark the filament 120 mm above the extruder inlet. Send
G91thenG1 E100 F60, which takes about 100 seconds, and measure from the inlet to the mark. The length that went in is 120 mm minus that measurement. Newrotation_distance= old value × length ÷ 100, rounded to three decimals. Say 97.5 mm went in at 4.69: 4.69 × 97.5 ÷ 100 = 4.573. Repeat if it was off by more than 2 mm. The designer suggests 300 to 400 mm for a more accurate result; raise the mark and replace 100 with the length you asked for. - Tune pressure advance. Slice Klipper’s square tower test at 100 mm/s with no infill. Before printing, send
SET_VELOCITY_LIMIT SQUARE_CORNER_VELOCITY=1 ACCEL=500andTUNING_TOWER COMMAND=SET_PRESSURE_ADVANCE PARAMETER=ADVANCE START=0 FACTOR=.005, Klipper’s values for direct drive. Find the height with the best corners: pressure advance = height in mm × 0.005, so the designer’s 0.02 to 0.03 range sits at 4 to 6 mm. Save it aspressure_advance, or set it per filament withSET_PRESSURE_ADVANCEin a print start macro; the Klipper macros page shows how a macro takes parameters.
Calibrate with the filament you print most: Klipper’s rotation distance guide notes that grip, and so the rotation distance, can vary between spools.
What is the rotation distance for the Orbiter extruder?
Start with 4.69, the designer’s published rotation distance for the Orbiter v2.0 and v2.5, used with no gear_ratio line. LDO’s sheet gives 4.637, which is the 690 steps/mm both publish converted to Klipper (200 × 16 ÷ 690 = 4.6377). The 1.1% gap is about 1 mm per 100 mm, and the mark-and-extrude test settles the final value.
The two differ because the designer publishes 690 steps/mm for Marlin and 4.69 for Klipper, and those do not convert exactly: 4.69 works out to 682 steps/mm. LDO converted the 690 instead. Neither number is tuned to your printer, since the real feed depends on how the drive gears grip your filament, and the designer says the v2.5’s new gears can shift it slightly. Step 5 measures that feed, so starting from 4.69 or 4.637 ends at the same calibrated value.
Klipper’s formula is rotation_distance = full_steps_per_rotation × microsteps ÷ steps_per_mm. Steps per mm doubles when microsteps double, so the rotation distance is the same at 16 or 32 microsteps. Rat Rig’s RatOS configs use 4.63 for the Orbiter 2, within 1% of LDO’s figure.
The rotation distance already includes the Orbiter’s planetary gearbox: it is the filament travel for one turn of the motor. Klipper divides rotation_distance by gear_ratio, so if you prefer to write the gearbox out, multiply rotation_distance by the same ratio and the motion stays identical. Klipper’s guide says that when unsure, do not set gear_ratio.
What run current does the Orbiter extruder need?
0.85 A RMS (root mean square, 1.2 A peak) is the run current the designer and LDO publish for the Orbiter v2.0 and v2.5 and their LDO-36STH20-1004AHG motor. In Klipper that is run_current: 0.85, with sense_resistor matched to your driver (0.110 for TMC2208 and TMC2209). At room temperature the motor runs at 65 to 75 °C, never hotter.
The designer measured the best extrusion performance at 0.85 A at 25 °C. Lower current means less extrusion force and lower extruder acceleration. Other published configs run lower:
| Source | run_current |
|---|---|
| Rat Rig’s RatOS, Orbiter 2 | 0.707 |
| Designer’s Orbitool O2 toolboard config | 0.8 |
| Designer’s v2.0 page and LDO’s sheet | 0.85 |
Turn it down in an enclosed chamber, where motor temperature rises one-for-one with the air: a motor at 65 °C in a 25 °C room reaches about 80 °C in a 40 °C chamber. The designer’s motor limits are 75 °C at room temperature and 80 to 85 °C in an enclosed chamber. They protect the Delrin planetary gears (rated to 120 °C) and stop the motor warming the drive gears enough to soften PLA and TPU. The chamber limit is higher because the filaments printed enclosed soften at higher temperatures.
A wrong sense_resistor is the dangerous mistake. Setting 0.110 on a TMC2660 driver that has 0.051 more than doubles the real current and more than quadruples the power heating the motor. The designer warns this “will melt all the plastic gearset before you even notice something is wrong.” The low-current test in step 4 catches this mistake.
In other firmware the same current is written differently: M906 T0 E850 (mA RMS) in Marlin and M906 E1200 I10 (1.2 A peak, 10% idle) in RepRapFirmware. A driver in standalone mode, with no UART (serial) link, takes its current from the trimmer: a reference voltage (Vref) of 1.2 V for a TMC2208 or TMC2209 with a 0.11 Ω shunt, per the designer.
The newer Orbiter v3.5 is different: the designer’s v3.5 page lists 0.55 A RMS, so do not reuse the 0.85 A value.
What retraction settings work with the Orbiter extruder?
1 to 1.5 mm at 120 mm/s is the starting retraction the designer and LDO give for the Orbiter v2.0 and v2.5, to be calibrated per filament. Drop the speed to 30 mm/s for TPU. The designer’s own toolboard config uses 1.2 mm at 120 mm/s, and Klipper reaches 120 mm/s only when max_extrude_only_velocity is at least 120.
With Klipper’s firmware retraction, add:
[firmware_retraction]
retract_length: 1.2
retract_speed: 120
unretract_extra_length: 0
unretract_speed: 120
Then turn on firmware retraction (G10/G11) in the slicer. Klipper’s defaults are 0 mm at 20 mm/s, so a bare [firmware_retraction] section retracts nothing. Change values per filament with SET_RETRACTION, for example SET_RETRACTION RETRACT_LENGTH=1.0 RETRACT_SPEED=30 for TPU. Without firmware retraction, enter the same length and speed in the slicer’s retraction settings.
The range matches other direct drive extruders (0.8 to 1.5 mm, as in adding direct drive to an Ender 3). If the extruder clicks on fast direction changes, the designer’s fix is limiting extruder acceleration to 3000 mm/s², which the block above already sets with max_extrude_only_accel. Rat Rig’s RatOS configs go further and cap retraction and extrude-only moves at 60 mm/s.
What are the Orbiter extruder steps per mm?
690 steps/mm at 16 microsteps (1380 at 32) is the Marlin and RepRapFirmware value for the Orbiter v2.0 and v2.5. It is Klipper’s rotation distance turned around: steps/mm = 200 × microsteps ÷ rotation_distance. So 3200 ÷ 4.637 = 690.1, and the designer’s 4.69 gives 3200 ÷ 4.69 = 682.3.
Convert a calibrated Klipper value the same way: 4.573 becomes 3200 ÷ 4.573 = 699.8 steps/mm at 16 microsteps. The designer’s Marlin commands for the Orbiter v2.0:
M350 E16               ; 16 microsteps
M92 E690               ; steps/mm, fine-tune it
M201 E3000             ; extruder acceleration, mm/s²
M203 E120              ; max extruder speed, mm/s
M205 E5                ; extruder jerk, mm/s
M906 T0 E850           ; motor current, mA RMS
M900 T0 K0.22 L0.02    ; linear advance, to be calibrated
M207 S1.5 F7200 Z0.2   ; firmware retraction
M500                   ; save to EEPROM
Some Marlin builds reject commands for features that are turned off. The designer says the ones that matter are the current and the steps/mm. Calibrate Marlin with the same mark test, inverted: new steps/mm = old steps/mm × 100 ÷ the measured length.
Does the Orbiter v2.5 use the same Klipper config as v2.0?
Yes. The designer says the Orbiter v2.5 uses the same firmware configuration as the v2.0. The base values are unchanged: 690 steps/mm at 16 microsteps, a rotation distance of 4.69 and 0.85 A. Its new flat-bottom, wide-cut drive gears can shift the rotation distance slightly, so run the 100 mm calibration again after fitting a v2.5.
That holds for a v2.0 converted with LDO’s upgrade kit, which swaps the drive gear shaft and idler gear. The Orbiter v3.5 lists the same 4.69 base rotation distance but a 0.55 A RMS stepper current, so take its values from the designer’s v3.5 page.
Sherpa Mini values are on the Sherpa Mini Klipper config page, and other extruder swaps are on the extruder upgrades hub.
Sources
- Orbiter Projects (Róbert Lőrincz), Orbiter v2.0: firmware configuration and assembly guide (accessed November 4, 2026)
- Orbiter Projects (Róbert Lőrincz), Orbiter v2.5 (accessed November 4, 2026)
- Orbiter Projects (Róbert Lőrincz), Orbiter v3.5 (accessed November 4, 2026)
- LDO Motors, Orbiter v2.0 firmware configuration (PDF, rev. 031c) (accessed November 4, 2026)
- Lorincz Electronics on GitHub, Orbitool O2 toolboard Klipper config (OrbitoolO2.cfg) (accessed November 4, 2026)
- Rat Rig on GitHub, RatOS-configuration extruders/orbiter-2.cfg (accessed November 4, 2026)
- Rat Rig on GitHub, RatOS-configuration LDO-36STH20-1004AHG extruder driver settings (24v-0.7a-e.cfg) (accessed November 4, 2026)
- Klipper documentation, Rotation distance (accessed November 4, 2026)
- Klipper documentation, Configuration reference (accessed November 4, 2026)
- Klipper documentation, TMC drivers (accessed November 4, 2026)
- Klipper documentation, Configuration checks (accessed November 4, 2026)
- Klipper documentation, Pressure advance (accessed November 4, 2026)
- Klipper documentation, G-Codes (accessed November 4, 2026)
- Klipper, example config printer-creality-ender3-s1-2021.cfg (accessed November 4, 2026)
- Marlin documentation, M92: Set Axis Steps-per-unit (accessed November 4, 2026)
- Marlin documentation, M906: Stepper Motor Current (accessed November 4, 2026)