Error #17813 means a tool pick or park on a multi-tool XL failed partway through a print. Recover the print by hand first. Then fix the dock or calibration that caused it, or the error will come back.
“Toolchanger problem has been detected. Park all tools to docks, leave the carriage free” is Prusa XL error #17813: a tool pick or park failed mid-print and the printer paused. Park every tool in its dock by hand, leave the carriage empty and press Continue. Then tighten that tool’s dock and rerun Dock Position Calibration for it.
It means the XL’s dock sensors disagree with the tool change the firmware just tried. Usually a tool did not lock on during a pick, or did not seat in its dock during a park. Prusa’s example is a tool parked in the wrong position that hits another parked tool. The print pauses and can be resumed.
Every tool reports whether it is picked and whether it is parked, and the firmware checks both at each step of a tool change. It starts this recovery when:
- the tool it is about to pick is not registering as parked in its dock
- a parked tool still does not register as parked after one small wiggle move
- a tool still registers as picked after the carriage has pulled away from the dock
- a picked tool does not register as picked, even after a wiggle
- during printing, a tool keeps reading as neither picked nor parked (it fell off), or the picked tool is not the one in use
Prusa lists three causes for those readings: a dock that moves, a dock position that has drifted and stiff coupler pins.
Related toolchanger errors, by code:
| Code |
On-screen title |
Message |
What it means |
| #17103 |
Dock position out of bounds |
“Dock %d position differs too much from expected values.” |
Dock calibration found a dock too far from where it should be |
| #17104 |
Tool offset out of bounds |
“Tool %d offset %c: %.3f is out of bounds [%.3f, %.3f].” |
One tool’s offset from tool 1 is outside the allowed range |
| #17135 |
Toolchanger error |
“Check all tools if they are properly parked or picked.” |
Red screen: a tool is in the wrong state; often debris or a bent dock pin |
| #17136 |
Calibrate dock from menu |
“Please run Dock Position Calibration from the Calibrations menu. Continuing can result in homing shifts and toolcrashes.” |
The dock positions need calibrating before more tool changes |
| #17138 |
Tool pickup failed |
“The tool was not detected after pickup. Motors are disabled. Make sure the tool is in its dock, then press Retry.” |
A pick did not register |
| #17813 |
Crash detected |
“Toolchanger problem has been detected. Park all tools to docks, leave the carriage free.” |
Print paused for recovery (this page) |
- Mind the heat. The tools can cause severe burns. Hold them by their plastic parts.
- Park the picked tool by hand. Move it to its dock and slide the tool changer to the right to release it. Then move the empty tool changer away from the docks.
- Check every other tool. Each one must sit fully in its own dock. The firmware accepts Continue only once every installed tool reads as parked.
- Press Continue. The printer picks the tool it needed, rehomes X and Y, reheats and resumes the print.
- Tighten the dock. After the print, try to move the dock of the tool that failed. It should not move at all. Push a 2.5 mm Allen key through the hole in the rear metal sheet to the middle screw in the xl-dock-cable-router and tighten it firmly.
- Clean the carriage and check the pins. Clear any debris from the tool changer carriage and make sure no dock pin is bent or damaged.
- Recalibrate that dock. Go to LCD Menu > Control > Calibrations & Tests > Dock Position Calibration, select the affected tool’s number and follow the screen (steps in the next section).
- Check the belts. Prusa says belts that are too loose or too tight move the gantry unevenly and can cause tool changer crashes and layer shifts. Set them with Prusa’s Adjusting belt tension (XL) procedure.
- Lubricate the coupler pins. Each tool has three coupler pins, and a dry pin can make picking or parking fail. Prusa’s coupler pin guide uses Prusa lubricant and a printed applicator called tc_greaser.
- Rerun Tool Offset Calibration. If the error persists after the dock is fixed, Prusa says to rerun Dock Position Calibration and then Tool Offset Calibration.
- Update the firmware. Install the current XL release (6.10.3 as of October 14, 2026). The table below lists the tool-change fixes.
- Suspect the cheese board. This is the electronic board on each tool that the changer’s locking mechanism grabs. If nothing above finds the cause, Prusa says it may be faulty: contact Prusa support.
Firmware releases that changed tool-change behavior on the XL:
| Version |
Change |
| 6.4.0 |
Withdrawn for the XL. Prusa told owners seeing layer shifts or random tool crashes to go back to 6.2.6 |
| 6.4.1 |
Tool park, pick and alignment moves no longer slow down when a low feedrate is set in the G-code, which had made tool changes unreliable |
| 6.10.2 |
A tool picked or parked by hand while idle is now treated as a normal tool change. Before this, the new tool’s extruder motor did not turn |
| 6.10.3 |
Current XL and XL+ stable release |
For pickup failures on other toolchangers, see failed tool pickups.
Run two calibrations from LCD Menu > Control > Calibrations & Tests, in this order. First Dock Position Calibration, done once per dock: it re-seats the dock with that tool locked in the changer. Then Tool Offset Calibration, which measures every tool against tool 1. To fine-tune the offsets afterwards, use Prusa’s manual calibration print.
Dock Position Calibration walks through each dock in turn. Have the kit’s universal wrench and mini wrench ready, and read each screen before acting:
- Remove the dock pins. With the mini wrench, unscrew and remove both metal pins on the dock.
- Loosen the dock screws. With the universal wrench, loosen its two screws by a few turns.
- Lock the tool in the changer. Move the tool changer by hand to the tool and lock the metal bars as the screen shows, so the tool is held in the changer.
- Tighten the upper screw. Tighten the upper screw on the side of the dock. After you confirm, the carriage leaves the dock carrying the tool, so keep the area clear.
- Tighten the lower screw. Tighten the lower screw on the side of the dock.
- Refit the pins. Insert both metal pins and tighten them with the mini wrench. The printer puts the tool back and makes a few calibration moves.
- Repeat for each dock. The wizard moves on to the next dock until all are done.
If the wizard stops with “Dock position out of bounds” (#17103), check that the long metal profile holding the docks is pushed all the way to the left (as seen from the back). Then tighten every dock with the long end of the 2.5 mm Allen key, pressing the dock in while you tighten, because it is a press fit. Check the belts too.
Tool Offset Calibration on the XL uses a calibration pin screwed into the heatbed:
- Unload all filament.
- Clean the nozzles. For each tool, pick it with Control > Pick/Park Tool, heat it to your last print temperature and brush the outside of the nozzle with a brass brush.
- Start the calibration. Leave the print sheet on the heatbed for the short first stage.
- Fit the calibration pin. When prompted, take the sheet off and screw the calibration pin clockwise into the center of the heatbed. The printer measures every tool.
- Remove the pin. Unscrew it counterclockwise, put the sheet back and let the printer finish. Prusa’s guide stores the pin in the side filament sensor.
The XL+ measures offsets with a contactless sensor instead of the pin, added in firmware 6.10.1.
All offsets are relative to tool 1, so an error on tools 2 to 5 can come from tool 1. If the calibration fails, check whether a nozzle sits too low and hits the plastic part of the pin. If so, loosen the nozzle’s grub screw, push the nozzle all the way up and retighten it.
Vibration from a printer running on the same table can also make the calibration fail. If it still fails, Prusa’s last step is a hard factory reset, which means running the whole selftest again.
To fine-tune the offsets after a nozzle crash or with a custom nozzle, Prusa publishes test G-code for the two-tool and five-tool XL that measures errors up to ±1 mm. Print it in light-colored PLA on the Satin sheet. For each tool, find the marks that line up best with tool 1’s comb: the largest mark is 0 and the medium marks are 0.5 mm. Add that value to the tool’s offset under LCD Menu > Settings > Tool > Tool #.
The printer started up as a single-tool XL, so it cannot change tools. At boot the firmware counts the toolhead boards (Prusa calls them Dwarf boards) that answer it. If only one answers, it runs as a single-tool printer. Any command to switch to another tool then stops with “Toolchanger not enabled”.
Prusa has no knowledge-base article for this message as of October 14, 2026. An October 2025 forum thread describes it on a two-tool XL whose calibration menus had switched to single-tool options, and it was never resolved. The closest documented fix is Prusa’s procedure for “Puppy not responding” (#17514), the error for a toolhead board that stops answering:
- Reflash the firmware from a USB drive, then restart with the reset button next to the knob.
- Check the toolhead cables. Switch the printer off and unplug it for at least 10 minutes. Then inspect each toolhead’s cable and connectors at both ends, the electronics board at the back and the Dwarf board on the toolhead, for loose, wrong or damaged connections.
A related message, “Toolchange to tool that is not enabled”, appears when a print or command calls for a tool number whose toolhead board the printer did not detect at boot.
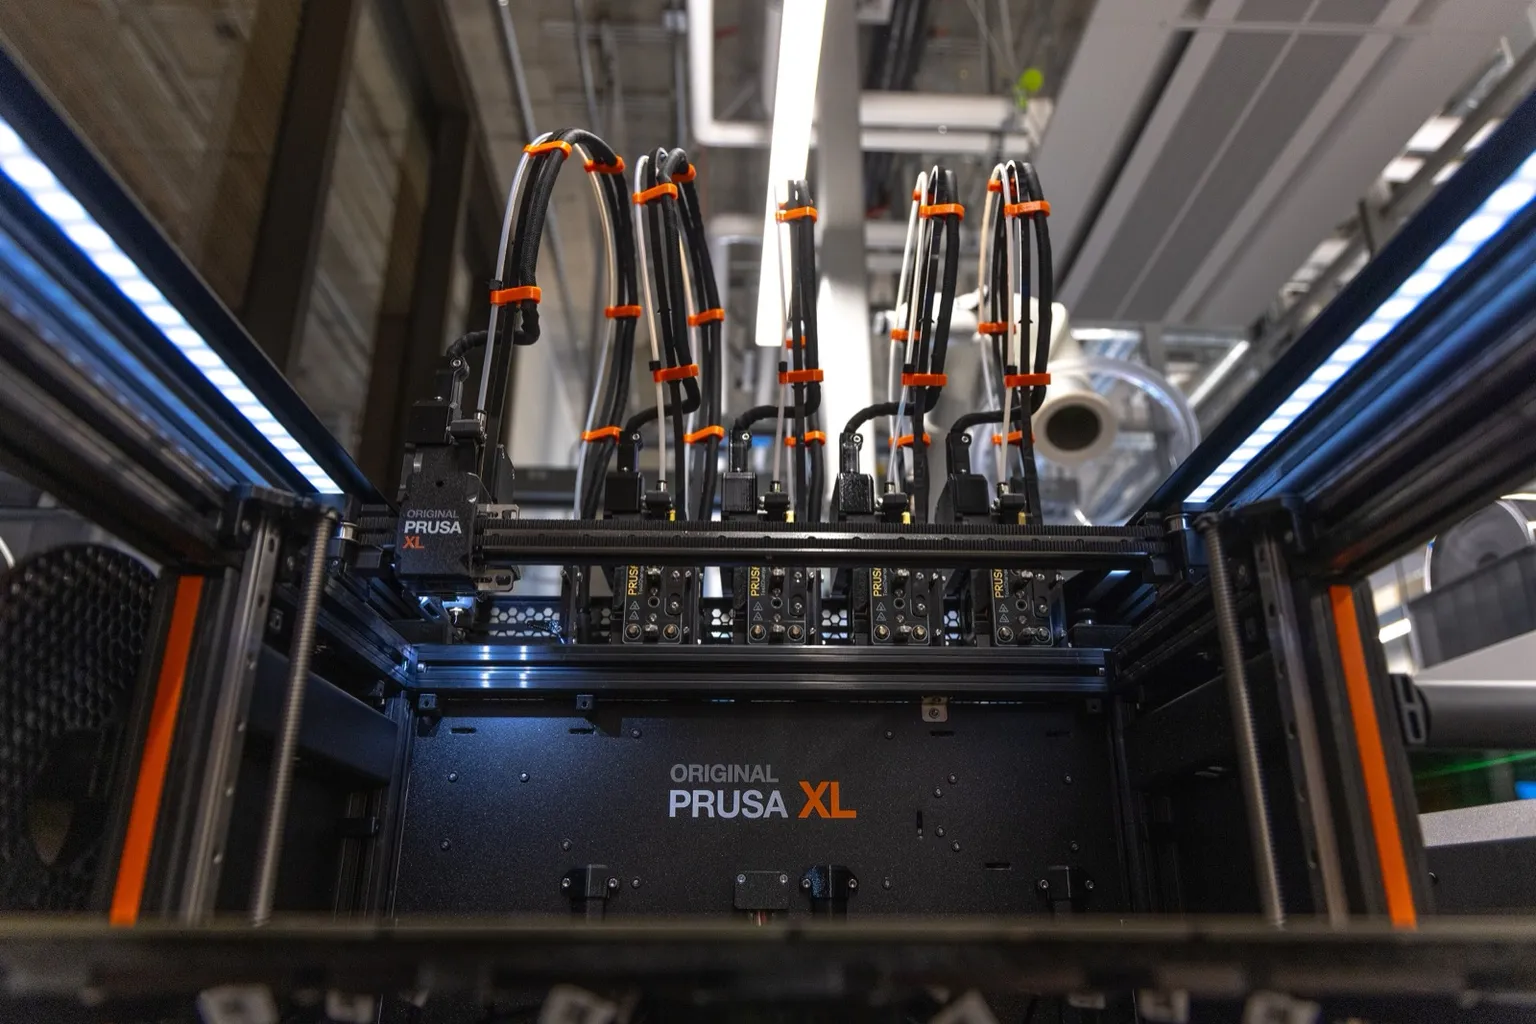
Crashes into parked tools come from the causes in the fix list: a loose or drifted dock, belts at the wrong tension, dry coupler pins or a faulty cheese board. The locking mechanism picks each tool by its cheese board, which carries 3 hexagonal positioning pins and 2 carrying pins. A tool that drops off the carriage mid-print reads as neither picked nor parked, so the firmware starts the same #17813 recovery.
On the Prusa forum, an owner of a five-tool XL with frequent #17813 errors reported in January 2026 that lubrication, tightening, rerunning the calibrations and newer firmware cut them down. Another poster saw fewer crashes after retensioning the belts. For how the XL’s system compares with other toolchangers, see the Prusa XL toolchanger.
.jpg)