How-to
PrusaLink in Home Assistant: setup and what it shows
Home Assistant has a built-in PrusaLink integration: add it under Settings, Devices & services and enter the printer's IP address, username and PrusaLink password. It reads print status and progress over your local network and adds pause, resume and cancel buttons. Its only camera entity shows the print file's thumbnail, not live video.
Edited by 3D Printeray EditorsPublished Last verified 7 min read
In this section: Offline & LAN(18)
On this page (6)
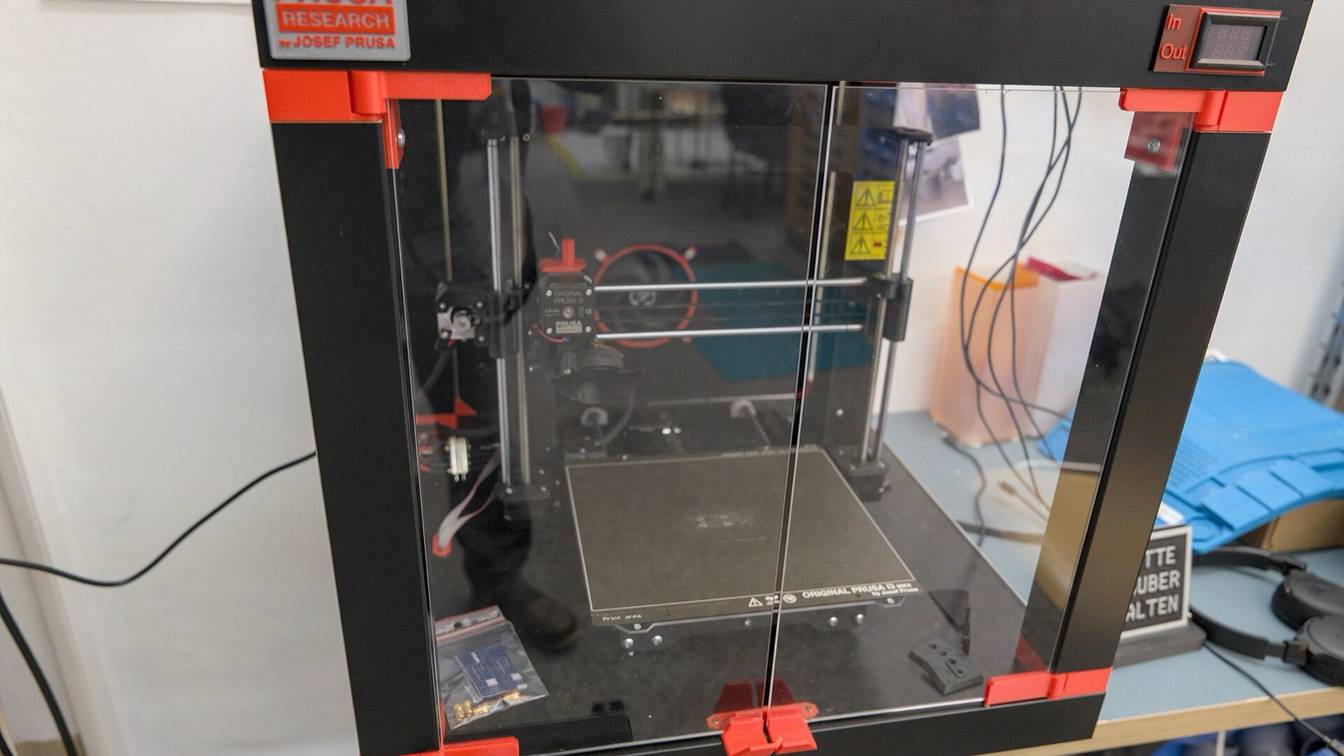

To add a Prusa printer to Home Assistant, use its built-in PrusaLink integration: Settings > Devices & services > Add integration > PrusaLink. Enter the printer’s IP address and PrusaLink password. The username is maker on the MINI, MK3.9, MK4, XL and CORE One.
The integration reads PrusaLink, the web interface that runs on the printer itself, over your local network every 30 seconds. It needs no Prusa account and no Prusa Connect login; Prusa says PrusaLink “is accessible only within your local network.” Home Assistant’s docs list the integration as community maintained. This page follows those docs and the integration’s code in Home Assistant 2026.11.0, checked on November 7, 2026.
How do you add PrusaLink to Home Assistant?
Open Settings, then Devices & services, select Add integration and choose PrusaLink. Enter the printer’s IP address as Host. On the MINI, MK3.9, MK4, XL and CORE One, keep the username maker and use the password from the printer’s PrusaLink menu. On a Raspberry Pi-based MK2.5 or MK3, use the username and password you created.
| Printer | Needs at least | Username | Password |
|---|---|---|---|
| Prusa CORE One | Its default firmware | maker (some models do not show it) |
From Settings > Network > PrusaLink on the printer; some models call it API key |
| Prusa MINI, MINI+ | Firmware 5.1.0 | maker |
Same as above |
| Prusa MK2.5, MK3, MK3S, MK3S+ (Raspberry Pi) | PrusaLink 0.7.2 | The one you set during PrusaLink setup | The one you set during PrusaLink setup, not the API key |
| Prusa MK3.9, MK4, XL | Firmware 4.7.0 | maker |
Same as the CORE One |
The docs do not name the MK3.5, which runs the same Buddy firmware (Prusa’s firmware for its 32-bit printers) as the MK4. The integration does not check the model: it accepts any printer that reports PrusaLink API version 2.0.0 or newer, and current Buddy firmware reports 2.0.0.
Where to find the PrusaLink password covers each model. If PrusaLink is not running yet, start with setting up PrusaLink.
How to set up the PrusaLink integration
- Update the printer if needed. Prusa’s guides cover the MINI, the MK4 and XL, the CORE One and PrusaLink on the MK2.5 and MK3. Firmware 4.7.x and 5.0.x are not available for the MINI, so it needs 5.1.0 or later.
- Note the address and password. On a Buddy-firmware printer, open Settings > Network > PrusaLink and note the IP address and password. On an MK2.5 or MK3, the IP address shows on the LCD after PrusaLink starts. Your router’s device list also shows the IP address or hostname.
- Add the integration. In Home Assistant, go to Settings > Devices & services, select Add integration and search for PrusaLink. If Home Assistant already spotted the printer, it is listed under Discovered and opens the same form.
- Fill in the form. Enter the IP address or hostname as Host, with or without
http://(Home Assistant adds it). Keepmakeras Username unless the printer is an MK2.5 or MK3. Enter the password. - Check the device. The printer appears as a device named after its hostname. Open it and confirm the printer state reads Idle, Ready or Printing rather than Unavailable.
If setup fails, the form shows one of these:
- Failed to connect: nothing answered at that address within 5 seconds. Check the IP address and that Home Assistant and the printer share a network.
- Invalid authentication: wrong username or password. On an MK2.5 or MK3, use the PrusaLink password, not the API key.
- Only PrusaLink API v2 is supported: the firmware or PrusaLink version is older than the table above. Update it and add the integration again.
Reserve the printer’s IP address in your router. If the address changes, every PrusaLink entity goes unavailable.
What does the PrusaLink integration show in Home Assistant?
The printer’s state, job progress, file name, estimated finish time and print speed are on from the start. Temperatures, fans and axis positions exist but are turned off when the printer is added.
| Type | On when added | Off until you enable them |
|---|---|---|
| Binary sensor | Connectivity: whether the printer’s Prusa Connect link is up (created only when Prusa Connect is set up) | MMU (Multi-Material Unit), SD card, Farm mode |
| Button | Pause job, Resume job, Cancel job, Continue job | None |
| Camera | Preview: the current print file’s thumbnail | None |
| Sensor | Printer state (named after the printer), Progress, Filename, Print start, Print finish, Print speed, Material | Nozzle temperature, Nozzle target temperature, Heatbed temperature, Heatbed target temperature, Print flow, Hotend fan, Print fan, Z-Height, X-Position, Y-Position, Nozzle diameter, Minimum extrusion temperature |
To turn on a temperature sensor, open the printer’s device page and select the link with the number of disabled entities. Pick the entity, select Settings, turn on Enabled and select Update. To enable several at once, go to Settings > Devices & services > Entities and filter by Disabled. Enter selection mode, tick the entities and choose Action > Enable selected.
- Printer state reads Idle, Busy, Printing, Paused, Finished, Stopped, Error, Attention or Ready. Attention means the printer is waiting for you.
- Buttons work only in a matching state. Pause job works while printing, Resume job while paused, Cancel job while printing or paused, and Continue job while the printer shows Attention. After a press, the integration polls every 5 seconds for the next 30 seconds, then goes back to every 30.
- Print start and Print finish are timestamps that exist only while a job is printing or paused. Print finish is the estimated end time.
- Controls stop at the four job buttons. The integration has no entities for setting temperatures, uploading files or starting a print; do those in PrusaLink’s own web page.
Does the PrusaLink integration show the camera in Home Assistant?
No live video. The integration’s only camera entity is Preview: a still image of the current print file’s thumbnail, fetched from the printer. It is unavailable when the printer is idle or the file has no thumbnail. For a live picture, add the camera to Home Assistant separately, such as the Buddy3D camera’s local video stream.
On the MK3.9, MK4 and XL, PrusaLink has no webcam to pass along. Prusa says “PrusaLink itself running on MK3.9, MK4 and XL printers doesn’t support any cameras.” It points to Prusa Connect, its cloud service, for cameras instead.
| Camera | What Home Assistant gets | Route |
|---|---|---|
| Buddy3D camera (Prusa’s Wi-Fi camera) | Live video on your local network | Generic Camera integration, using the camera’s RTSP (Real Time Streaming Protocol) stream; steps below |
| Camera on a Raspberry Pi running OctoPrint | The camera feed configured in OctoPrint | OctoPrint integration; Prusa says its tested Pi cameras also work with “RPi + Octoprint on MK4 / MK3.9 / XL printers” (PrusaLink vs OctoPrint) |
| Camera on the Raspberry Pi running PrusaLink (MK2.5, MK3) | Nothing from the PrusaLink integration, which has no entity for it | View it on the Cameras tab of PrusaLink’s web page, or link it to Prusa Connect there |
| Phone, tablet, laptop or Camera API camera added in Prusa Connect | Nothing: these send their images to Prusa Connect | View them in Prusa Connect |
Prusa Connect shows snapshots, not video. The Buddy3D camera uploads one every 10 to 90 seconds, at the interval you set. Prusa says its live feed “only works in the Prusa App or via a network player such as VLC.”
Add a Buddy3D camera stream to Home Assistant
- Find the camera’s IP address in your router’s list of connected devices.
- Test the stream in the VLC media player at
rtsp://<camera IP>/live. You can leave out the default port, 554. If it does not play, check Local Stream Mode in the camera’s details in the Prusa App. - Add Generic Camera. In Home Assistant, go to Settings > Devices & services, select Add integration and choose Generic Camera. Put the RTSP address in Stream Source and leave Still Image URL empty. That works because the Stream integration is part of Home Assistant’s default configuration.
Prusa notes the stream is unencrypted and works only on your local network. Home Assistant serves the picture through its own server, so it also plays outside your network wherever Home Assistant is reachable.
How to get a notification when a Prusa print finishes
Trigger on the printer state sensor changing to finished and send a message to the Home Assistant Companion app on your phone. Because the integration polls every 30 seconds, the alert can arrive up to 30 seconds after the print ends.
- Create the automation. Go to Settings > Automations & scenes and select Create automation > Create new automation.
- Open the YAML editor. Select Menu in the upper-right corner, then Edit in YAML.
- Paste the YAML below. Replace
sensor.my_prusawith your printer state sensor, the one named after the printer. Replacenotify.mobile_app_my_phonewith your phone’s action:notify.mobile_app_followed by its device ID. - Save. Select Save.
alias: "Prusa print finished"
triggers:
  - trigger: state
    entity_id: sensor.my_prusa
    to: "finished"
    not_from:
      - "unavailable"
      - "unknown"
actions:
  - action: notify.mobile_app_my_phone
    data:
      message: "The print on the Prusa has finished."
The not_from lines stop a false alert when Home Assistant restarts or loses the printer for a moment and the state comes back as Finished. To hear when the printer stops and waits for you, make a copy with to: "attention".
Sources
- Home Assistant, PrusaLink integration (accessed November 7, 2026)
- Home Assistant core on GitHub, Release 2026.11.0 (November 4, 2026) (accessed November 7, 2026)
- Home Assistant core on GitHub (2026.11.0), prusalink/config_flow.py (setup form and version check) (accessed November 7, 2026)
- Home Assistant core on GitHub (2026.11.0), prusalink/strings.json (entity names and setup errors) (accessed November 7, 2026)
- Home Assistant core on GitHub (2026.11.0), prusalink/sensor.py (accessed November 7, 2026)
- Home Assistant core on GitHub (2026.11.0), prusalink/binary_sensor.py (accessed November 7, 2026)
- Home Assistant core on GitHub (2026.11.0), prusalink/button.py (accessed November 7, 2026)
- Home Assistant core on GitHub (2026.11.0), prusalink/camera.py (Preview camera) (accessed November 7, 2026)
- Home Assistant core on GitHub (2026.11.0), prusalink/coordinator.py (polling interval) (accessed November 7, 2026)
- Home Assistant core on GitHub (2026.11.0), prusalink/__init__.py (platforms) (accessed November 7, 2026)
- Home Assistant core on GitHub, PR #169310: PrusaLink sd_ready, farm_mode and status_connect binary sensors (accessed November 7, 2026)
- Home Assistant, Customizing entities (disabling or enabling an entity) (accessed November 7, 2026)
- Home Assistant, Automation editor (accessed November 7, 2026)
- Home Assistant, State changed trigger (accessed November 7, 2026)
- Home Assistant Companion Docs, Notifications introduction (accessed November 7, 2026)
- Home Assistant, Generic Camera integration (accessed November 7, 2026)
- Home Assistant, Default Config integration (includes Stream) (accessed November 7, 2026)
- Home Assistant, OctoPrint integration (accessed November 7, 2026)
- Prusa Knowledge Base, Prusa Connect and PrusaLink explained (accessed November 7, 2026)
- Prusa Knowledge Base, Buddy3D Camera (accessed November 7, 2026)
- Prusa Knowledge Base, Camera setup for PrusaLink / Prusa Connect (guide, PDF generated May 13, 2026) (accessed November 7, 2026)
- Prusa Knowledge Base, Camera compatibility (RPi + PrusaLink) (accessed November 7, 2026)
- Prusa Knowledge Base, Prusa Connect - Camera API (accessed November 7, 2026)
- Prusa-Firmware-Buddy on GitHub, README (supported printers) (accessed November 7, 2026)
- Prusa-Firmware-Buddy on GitHub, lib/WUI/link_content/basic_gets.h (PrusaLink API version 2.0.0) (accessed November 7, 2026)