How-to
PrusaLink on a Raspberry Pi for the MK3S and MK2.5S
The 8-bit Prusa MK3S and MK2.5S get PrusaLink through a Raspberry Pi. A Pi Zero W or Zero 2 W plugs onto the MK3S's Einsy board, and a Pi 3, 3+, 4 or 5 connects to either printer over USB. You flash Prusa's image, set the printer's RPi port and finish a browser wizard.
Edited by 3D Printeray EditorsPublished Last verified 9 min read
In this section: Offline & LAN(18)
On this page (8)

To run PrusaLink on a Raspberry Pi, write Prusa’s PrusaLink SD card image to a microSD card with Raspberry Pi Imager and connect the Pi to the printer. Then set the printer’s RPi port and finish the setup wizard at the IP address on the printer’s screen.
A Raspberry Pi Zero W or Zero 2 W plugs onto the Einsy RAMBo, the mainboard of an MK3, MK3S or MK3S+ (RPi port ON). A Raspberry Pi 3, 3+, 4 or 5 connects over USB to those printers and to the MK2.5 and MK2.5S (RPi port OFF). An MK3.5 or MK3.9 upgrade has PrusaLink built in and needs no Pi. So do Prusa’s 32-bit printers such as the MK4S, CORE One and XL: see PrusaLink setup.
Which Raspberry Pi works with PrusaLink?
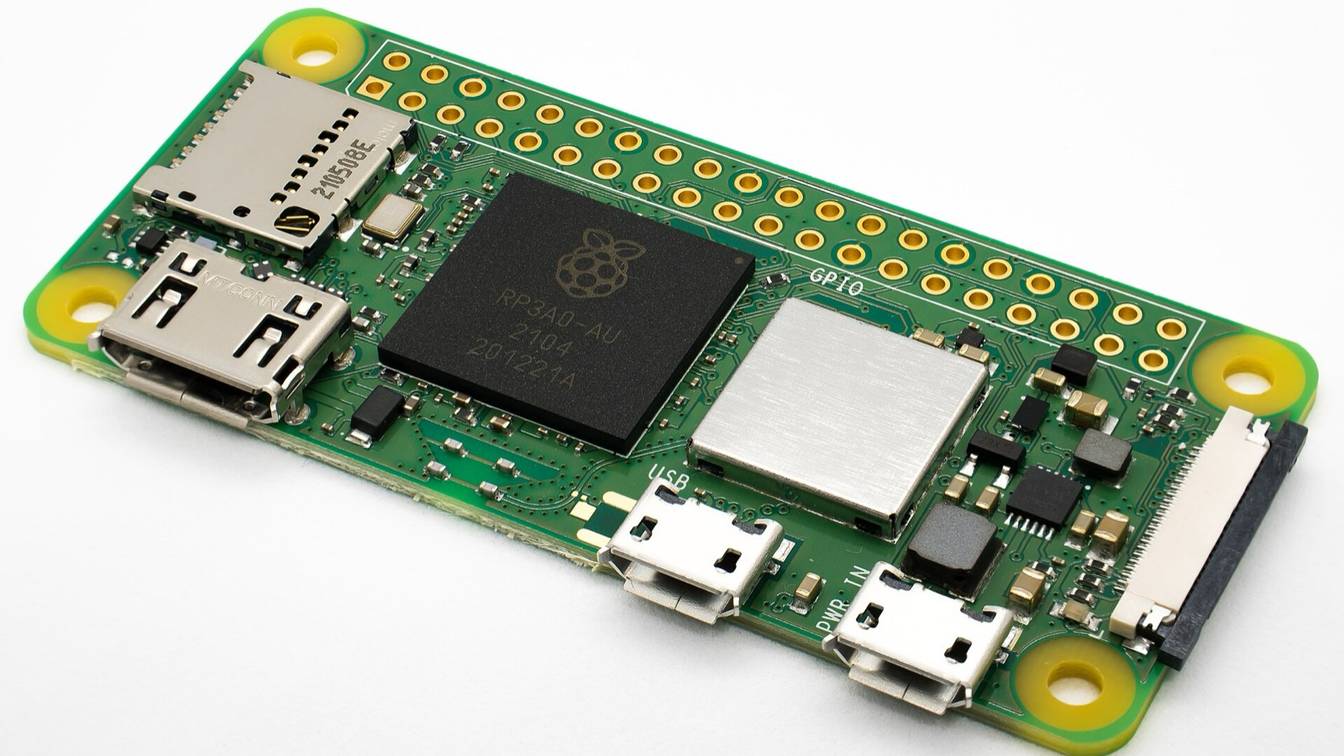
Prusa supports the Raspberry Pi Zero W and Zero 2 W on the general-purpose input/output (GPIO) pins of the MK3S’s Einsy board. It supports the Raspberry Pi 3, 3+, 4 and 5 over USB. The Pi Zero without Wi-Fi, the Pi 2 and older boards are unsupported. Prusa says the Zero 2 W is faster than the Zero W.
| Model | Connection | Supported by Prusa | Notes |
|---|---|---|---|
| Raspberry Pi 2 and older | None | No | Listed as unsupported |
| Raspberry Pi 3 | USB | Yes | Needs its own micro USB power supply |
| Raspberry Pi 3+ | USB | Yes | Needs its own micro USB power supply |
| Raspberry Pi 4 | USB | Yes | Needs its own USB-C power supply |
| Raspberry Pi 5 | USB | Yes | Needs PrusaLink 0.8.1; GPIO works only with a manual port setting (below) |
| Raspberry Pi Zero | None | No | No Wi-Fi |
| Raspberry Pi Zero 2 W | GPIO (Einsy) | Yes | MK3 family only; powered by the printer |
| Raspberry Pi Zero W | GPIO (Einsy) | Yes | MK3 family only; powered by the printer; not the Zero WH with a pre-fitted 40-pin header |
Prusa’s guides also call for a 2.4 GHz Wi-Fi network and a microSD card of 8 GB or larger (SDHC, Class 10), preferably a name brand. Prusa does not cover other single-board computers such as Banana Pi or Orange Pi.
A Raspberry Pi 5 on the Einsy GPIO pins needs one manual change. PrusaLink’s autodetection looks for /dev/ttyAMA0, but the Pi 5 port is /dev/ttyAMA10. Put a prusalink.ini containing port = /dev/ttyAMA10 under a [printer] section in the card’s boot partition. PrusaLink copies it to its default location on the next boot.
How do you install PrusaLink on a Raspberry Pi?
Flash Prusa’s PrusaLink image to a microSD card with Raspberry Pi Imager, entering your Wi-Fi details before writing. Fit the Pi: a Zero W or Zero 2 W onto the MK3S’s Einsy board, or a Pi 3, 4 or 5 over USB. Set RPi port, boot, then open the printer’s IP address and finish the PrusaLink wizard.
Before you start, gather:
- Printer firmware 3.14.0 or newer. The PrusaLink 0.8.1 release notes set this minimum, though Prusa’s setup guides still say “3.10.1 and up”. The current 8-bit firmware is 3.14.1, released November 28, 2024.
- A microSD card. 8 GB or larger.
- For a Pi Zero. Two printed parts and, unless the Pi came from Prusa, a soldered header (see Preparing a Pi Zero for the Einsy board).
- For a Pi 3, 4 or 5. A case, the Pi’s own power supply, and the USB A-to-B cable that came with the printer.
How to install PrusaLink, step by step
- Check the printer firmware. On the printer, open menu > Support and scroll to the firmware version. If it is older than 3.14.0, update the firmware first.
- Download the image. On Prusa’s Prusa-Link releases page, open Assets under the latest release and download
prusalink-0.8.1.img.xz. - Load it in Raspberry Pi Imager. Prusa recommends Imager version 1.8.5, after reports of problems with 2.0.0 (for Imager 2.x, use Prusa’s repository file). Choose CHOOSE OS, then Use Custom, and select the image. Then choose CHOOSE STORAGE and pick the microSD card. Do not write yet.
- Set hostname and Wi-Fi. Choose EDIT on the OS Customisation settings. Set a unique, plain-text hostname for the printer, then enter your Wi-Fi network name (SSID) and password. Leave the username and password empty; Prusa says SSH is for experienced users only.
- Write the card. Save the settings, click WRITE and confirm. Ignore any prompt from your computer’s operating system to format the card.
- Connect the Pi. With the printer off and unplugged, insert the card into the Pi. A Pi Zero goes onto the Einsy board on its printed frame (see below). A Pi 3, 4 or 5 connects with the USB A-to-B cable from a Pi USB port to the USB port on top of the printer’s electronics box.
- Set RPi port. Turn the printer on and go to menu > Settings > RPi port. Set it to ON for a Pi Zero on the GPIO pins, or OFF for a Pi on USB. Plug in the full-size Pi’s power supply.
- Wait for the first boot. Prusa warns the first boot can take a long time. The screen may show “RPi Booting…” or “Starting Prusa Link”, then the printer’s IP address on the bottom line. The address also appears in the Support menu.
- Open the wizard. In a browser on the same network, enter the IP address, or
http://yourhostname.localif your network supports.localnames. Click Setup credentials | NEXT. - Create PrusaLink credentials. Set a username and password for this printer. They are not your Prusa Account login; you use them to open PrusaLink directly. Click Printer Info | NEXT.
- Name and save. Enter the printer’s name and location, click Recap and save | NEXT, and check the summary. Choose Save printer and link with Connect | NEXT to add it to Prusa Connect, or Save printer | NEXT to keep it on your local network only.
To print, open the IP address, log in and drop a G-code file into PrusaLink. Or add the printer in PrusaSlicer as a physical printer; PrusaLink advertises itself on the network, so it shows up under Physical Printers > Browse.
While the printer is on, Prusa says not to move the axes by hand, connect or disconnect the Pi, insert or remove its microSD card, or touch the Pi board.
Preparing a Pi Zero for the Einsy board
The Pi Zero sits on the Einsy RAMBo’s RPi port and draws power from the printer. Never plug a power supply into its PWR IN socket.
- Print the frame and cover. Download
rpi-zero-frame.stlandraspberry-cover.stlfrom Prusa’s MK3S printable parts on Printables. Prusa recommends PETG at 0.20 mm Quality. The frame is mandatory: without it, Prusa says, “you will short-circuit contacts on the Rambo board.” - Fit the header. Prusa’s guide says a Pi Zero W bought from Prusa’s shop comes ready to use. Otherwise, cut a 2x20 dual male header to 2x7, remove the short pins, and fit 18 mm pins in only five positions. Check that they protrude at least 1 mm and line up with the printed frame, then solder them.
- Open the electronics box. With the printer off and unplugged, cut the marked plastic tabs out of the Einsy-base with a sharp utility knife, without touching the board. The raspberry-cover fits electronics box revision B7 or later; older MK3 boxes may lack the removable section and need the newer part.
- Stack and fit. Insert the card, stack the Pi on the frame, press it onto the Einsy board and fit the raspberry-cover.
If the printer shows NO IP or NO LAN ACCESS
- NO IP usually means a weak signal or another network problem. Move the printer closer to the access point. Or go wired: a micro USB Ethernet adapter on a Pi Zero, or the Ethernet port on a Pi 3, 4 or 5. PrusaLink prefers the wired network when both are present.
- NO LAN ACCESS or another network error means the Wi-Fi settings need redoing. Write the card again with the correct SSID and password.
- The hostname does not open. Prusa notes that, depending on your network, the
.localhostname may not work. Use the IP address instead. - The IP address changed. Your router can hand out a new address after a reconnect. Prusa’s fix is to set the router to always assign the same address to the device.
- The wizard asks for a serial number. When PrusaLink cannot read it from the printer, it asks for the serial number (S/N) starting with CZP from the label on the back. Prusa says the wizard verifies the serial number with Prusa servers; contact Prusa support if it is refused.
Where do you get the PrusaLink SD card image?
Prusa publishes the image on its GitHub releases page. The current file is prusalink-0.8.1.img.xz, a download of about 786 MB, based on Raspberry Pi OS 2024-03-15 (Debian 12 Bookworm). A second file, prusalink-multi-instance-0.8.1.img.xz, runs several USB-connected printers from one Pi.
In Raspberry Pi Imager 2.x, Use Custom no longer offers the hostname and Wi-Fi settings. Raspberry Pi’s documentation explains that Imager hides customisation for a local image file because it lacks the metadata. Prusa’s fix, posted on GitHub in February 2026, is a repository file.
In Imager 2.x, go to App Options > Content Repository, choose Use custom URL and enter https://prusa3d.github.io/Prusa-Link/prusalink.json. PrusaLink 0.8.1 then appears in the OS list with customisation enabled. Prusa’s help guides still describe the Imager 1.8.5 method.
To configure PrusaLink by hand, put a prusalink.ini or prusa_printer_settings.ini file in the card’s boot partition. That is the partition Windows and macOS show, and PrusaLink copies the files into place on the next boot. Prusa’s README gives the image’s console login as user jo with password raspberry.
Does PrusaLink work on the MK3S, MK3 and MK2.5S?
Yes. PrusaLink is built for the 8-bit Prusa printers: the MK2.5, MK2.5S, MK3, MK3S and MK3S+. The MK3 family can use a Pi Zero on the Einsy board’s GPIO pins or a full-size Pi over USB. The MK2.5 and MK2.5S have no Einsy port, so they connect over USB only.
Firmware 3.14.0 and PrusaLink 0.8.1 came out together on July 2, 2024. PrusaLink 0.8.1 requires that firmware, and the 3.14.1 firmware notes say to “update Prusa Link to version 0.8.1 or newer.”
The pair adds Set Ready and Reprint items to the printer’s menu and power panic recovery for PrusaLink prints. PrusaLink-hosted prints also count toward the printer’s statistics. With a Prusa MMU (multi-material unit) attached, PrusaLink 0.8.1 reports only its connection status.
Is PrusaLink still maintained for the MK3S?
Yes, though releases are slow. As of November 7, 2026, the latest release is still PrusaLink 0.8.1 from July 2, 2024. Prusa’s GitHub repository shows version 0.9.0 in development in October and November 2026. Prusa’s help center still documents the Raspberry Pi setup for the MK3S and MK2.5S in an article updated October 12, 2026.
Prusa’s help center says PrusaLink supersedes its discontinued PrusaPrint setup, which was OctoPrint on a Pi Zero W. Prusa still documents OctoPrint for the MK2.5S and MK3S. For how the two compare on these printers, see PrusaLink vs OctoPrint.
To update, open PrusaLink’s Settings tab and click Check Updates, or use the arrow icon on the printer’s page in Prusa Connect. Both need internet access. PrusaLink 0.7RC3 and older cannot update over the air; write a fresh image to the card instead, which also works with no internet.
Does PrusaLink support a camera on the Raspberry Pi?
Yes. PrusaLink on a Raspberry Pi works with Raspberry Pi ribbon-cable (CSI) cameras (Camera Module 1.3, 2 and 3, including NoIR and Wide) and with USB webcams. On a Pi Zero, a USB webcam needs a USB On-The-Go (OTG) adapter in the port labeled USB. Turn on Link camera to Connect in PrusaLink’s Cameras tab.
PrusaLink accepts only CSI cameras on its whitelist of sensors, so other CSI modules may not appear. Prusa notes that a Pi Zero may limit resolution to 1920 px on each axis. Of the USB webcams Prusa tested, it flags the Logitech C270 as not working properly. Connect a camera only with the printer powered off.
Sources
- Prusa Knowledge Base, PrusaLink and Prusa Connect setup (MK3/S/+) (accessed November 7, 2026)
- Prusa Knowledge Base, PrusaLink / Prusa Connect with RPi 3/4 USB (MK2.5/S MK3/S/+) (accessed November 7, 2026)
- Prusa Knowledge Base, Prusa Connect and PrusaLink explained (updated October 12, 2026) (accessed November 7, 2026)
- Prusa Knowledge Base, How to update PrusaLink (MK2.5/S MK3/S/+) (accessed November 7, 2026)
- Prusa Knowledge Base, How to set a static IP Address (accessed November 7, 2026)
- Prusa Knowledge Base, Camera setup for PrusaLink / Prusa Connect (accessed November 7, 2026)
- Prusa Knowledge Base, Camera compatibility (RPi + PrusaLink) (accessed November 7, 2026)
- Prusa Research on GitHub, Prusa-Link releases (accessed November 7, 2026)
- Prusa Research on GitHub, PrusaLink 0.8.1 release notes (July 2, 2024) (accessed November 7, 2026)
- Prusa Research on GitHub, Prusa-Link README (accessed November 7, 2026)
- Prusa Research on GitHub, Prusa-Link ChangeLog (accessed November 7, 2026)
- Prusa Research on GitHub, Prusa-Link configuration reference (prusalink.ini) (accessed November 7, 2026)
- Prusa Research on GitHub, PrusaLink multi-instance documentation (accessed November 7, 2026)
- Prusa Research on GitHub, PrusaLink setup wizard serial number page (wizard_serial.html) (accessed November 7, 2026)
- Prusa Research on GitHub, Prusa-Link issue #1035, Raspberry Pi Imager 2.0.0 does not allow customization (accessed November 7, 2026)
- Prusa Research on GitHub, PrusaLink repository file for Raspberry Pi Imager (accessed November 7, 2026)
- Prusa Research on GitHub, Prusa-Link commit history (accessed November 7, 2026)
- Prusa Research on GitHub, Prusa-Firmware 3.14.0 release notes (accessed November 7, 2026)
- Prusa Research on GitHub, Prusa-Firmware 3.14.1 release notes (November 28, 2024) (accessed November 7, 2026)
- Raspberry Pi on GitHub, rpi-imager: Generate a local manifest file (accessed November 7, 2026)